
Manual / Nucleus
Nucleus user manual
This manual covers hardware setup, Nucleus OS, and app configuration for the Nucleus mesh radio.
01First Steps
First Steps
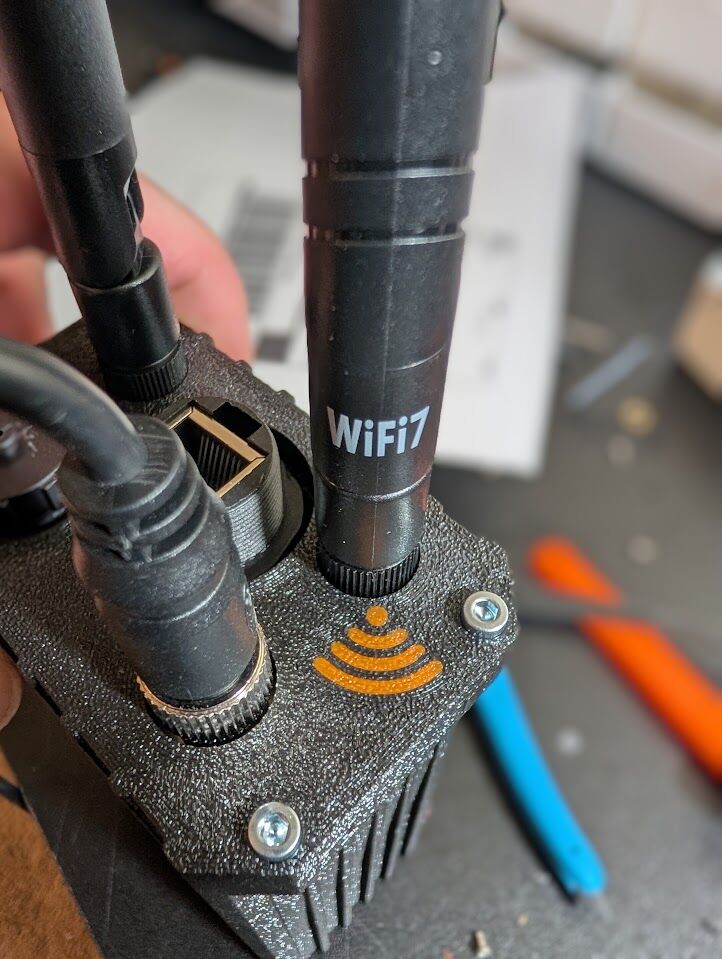
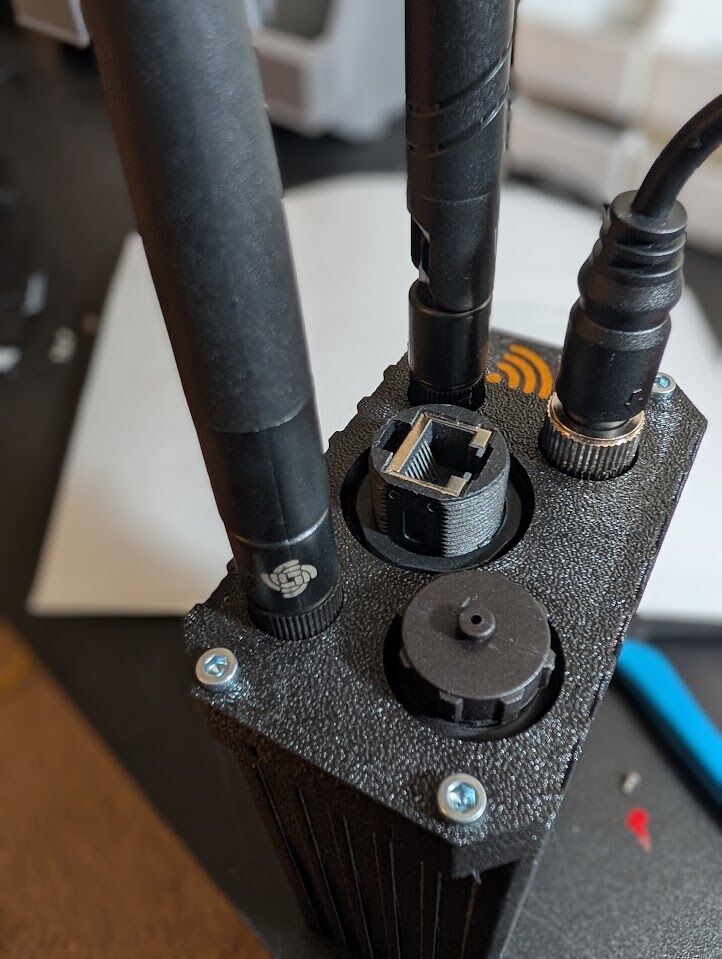
The Nucleus ships without its antennas installed. The Wi-Fi antenna is marked with "WiFi" on the antenna itself and with a small WiFi symbol next to the port it should be installed on (Fig. 1). The LoRa antenna is installed on the unmarked RF connector (Fig. 2).
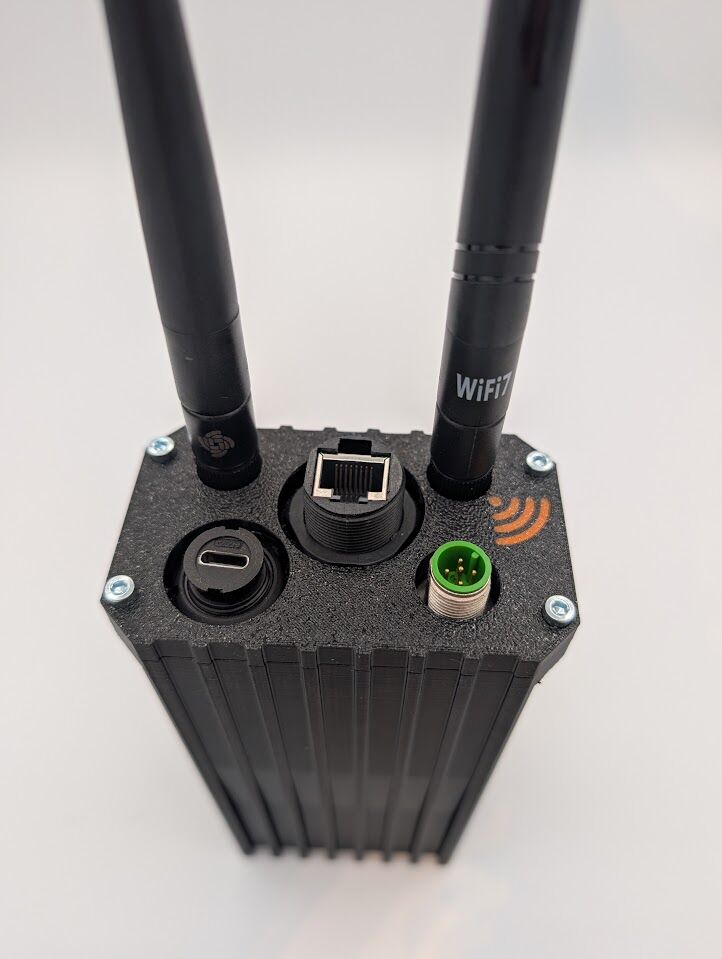
The Nucleus has three bulkhead connections alongside the antenna ports (Fig. 3): a USB-C port, an RJ45 Ethernet port, and the M12 power port.
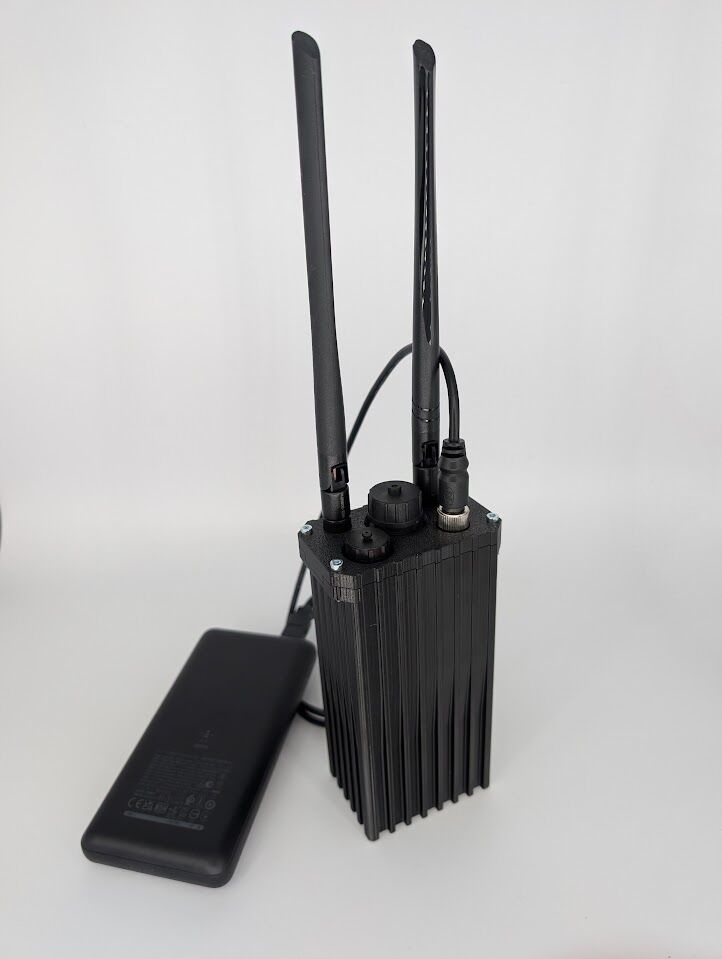
The Nucleus ships with a USB-A to M12 cable. Screw the M12 connector onto the M12 power port, then plug the USB-A end into any 5V power source to start the Nucleus. Auto boot should be complete within 1 minute. The general assembly is shown with a generic USB power bank providing power (Fig. 4).
02Node Placement
Node Placement
Placement of Radio
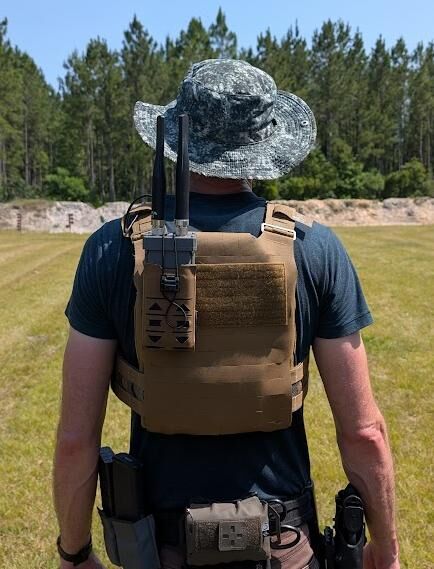
Due to the nature of the shorter wavelengths of the onboard radios, it is recommended to mount the antennas as high as possible on the body to provide the best line of sight (Fig. 5). Either by physically setting the radio higher or using remote mount antennas.
03Nucleus OS
Nucleus OS
After the Nucleus has booted it will begin advertising a WiFi access point labelled as 00xx-nucleus-ap, where xx is your node's serial number. The default password is 52235223. This should be changed via the configuration page as soon as possible.
Once connected to that access point, take the web browser to 10.20.xx.1:5000 where xx is the serial number of your node. This will open the Nucleus OS UI. Alternatively, the node can be reached by hostname at 00xx-nucleus.local, where xx is the same serial number.
Front Page
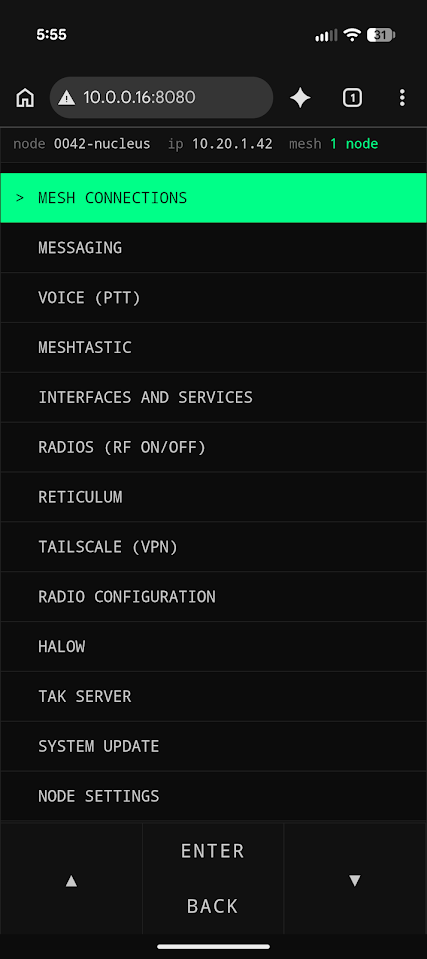
The front page displays a menu of the available functions on the Nucleus, with navigation buttons along the bottom of the screen (Fig. 6).
Mesh Connections
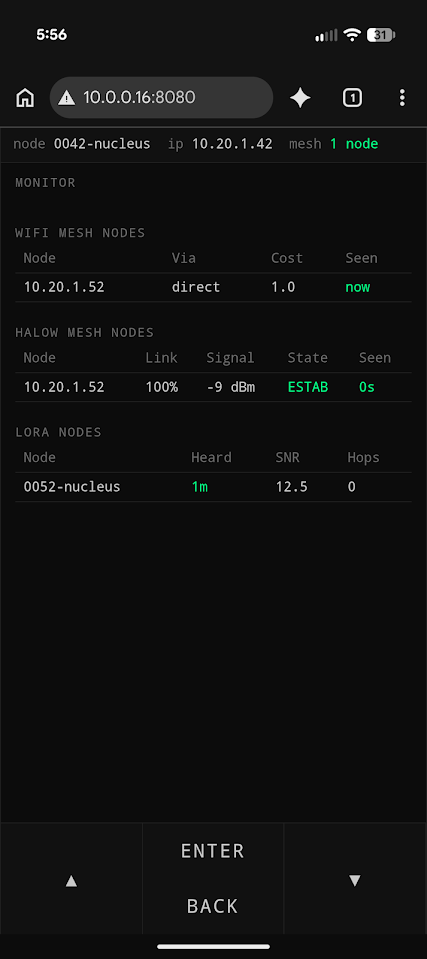
The Mesh Connections page displays the connected nodes on both the WiFi and LoRa meshes (Fig. 7).
Voice (PTT)
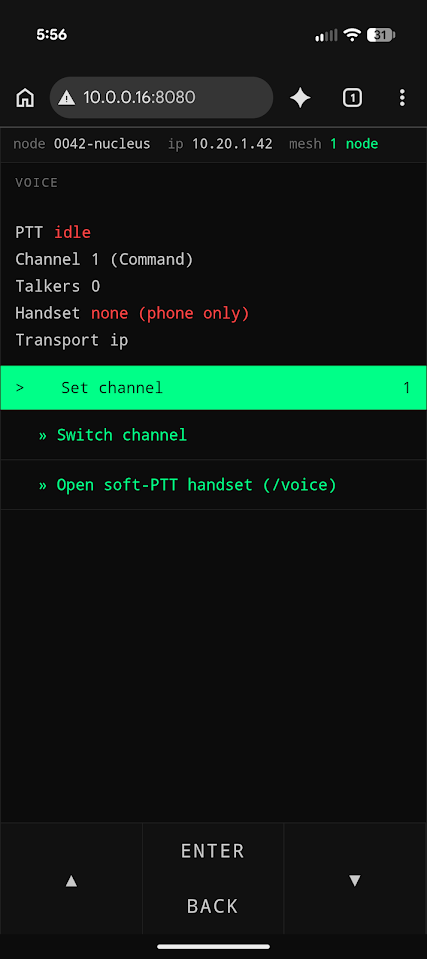
This page shows the push-to-talk state, the current voice channel, the number of talkers, the connected handset and the transport in use (Fig. 8). The voice channel is set and switched here. Open soft-PTT handset opens the handset in the browser.
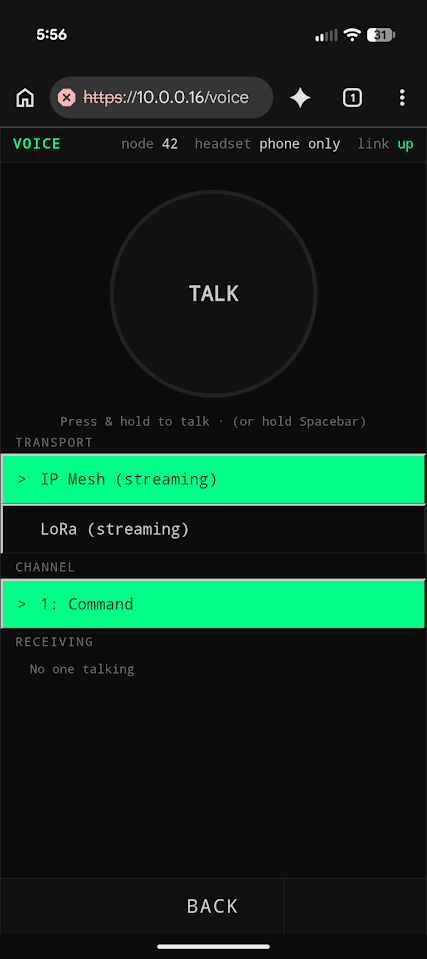
The soft-PTT handset opens at /voice on the node over HTTPS (Fig. 9). Press and hold TALK, or hold the spacebar, to talk. The handset can transmit over the IP mesh or over LoRa, and shows the channel and who is talking.
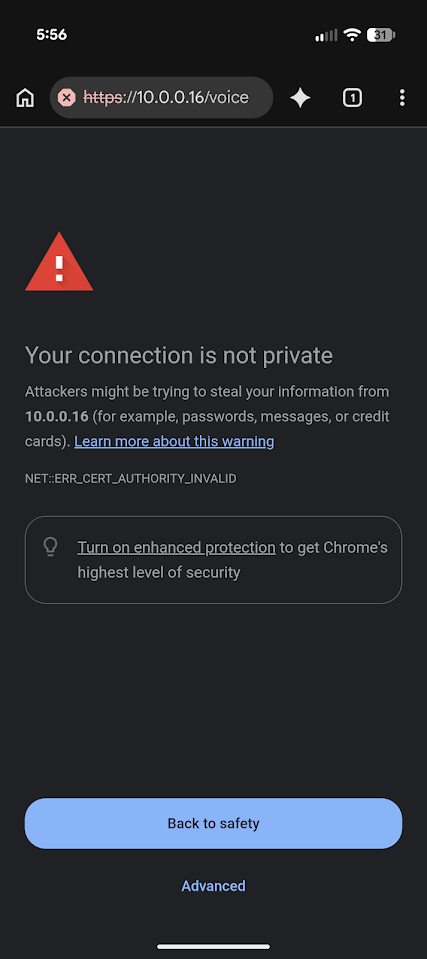
The handset uses the node's own certificate, so the browser shows a warning when the page is first opened (Fig. 10). Tap Advanced, then continue to the page.
Meshtastic
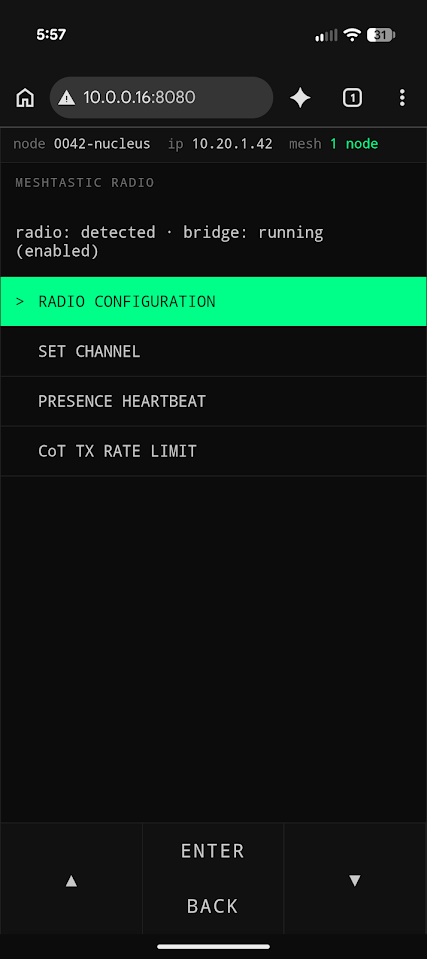
This page shows whether the Meshtastic radio is detected and whether the bridge is running (Fig. 11). The radio configuration, channel, presence heartbeat and CoT TX rate limit are set from here.
Meshtastic Radio Configuration
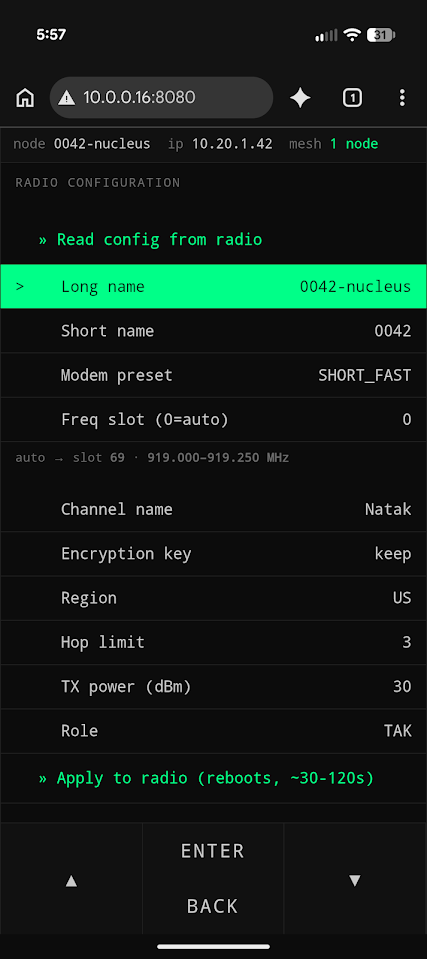
Read config from radio loads the radio's current settings (Fig. 12). The node names, modem preset, frequency slot, channel name, encryption key, region, hop limit, TX power and role can then be changed. A frequency slot of 0 picks the slot automatically. Apply to radio saves the changes and reboots the radio, which takes about 30–120 seconds.
Meshtastic Channel
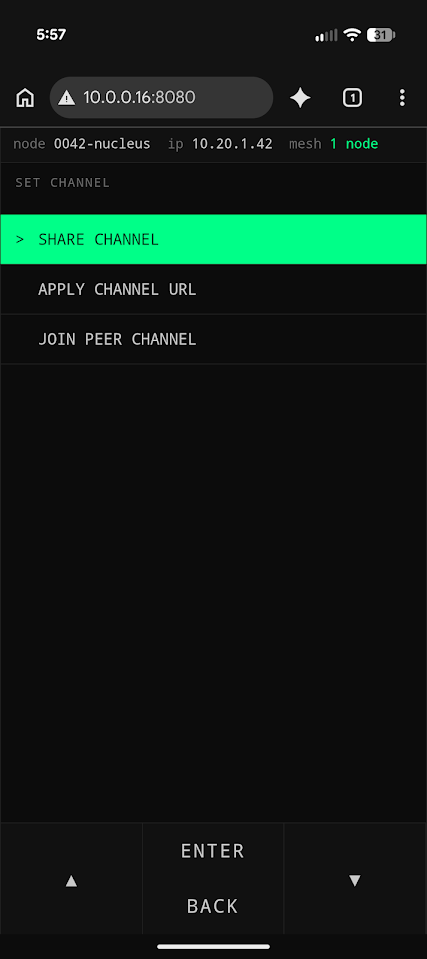
This page shares the node's channel, applies a channel URL, or joins a peer's channel (Fig. 13).
Interfaces and Services
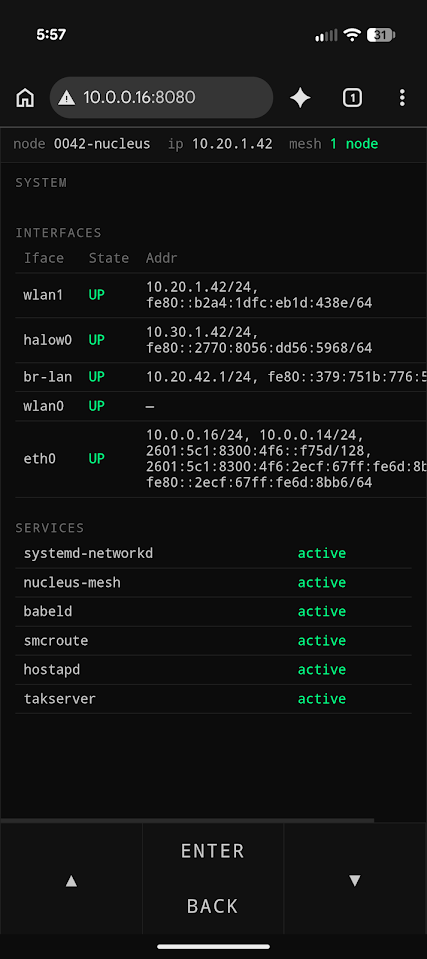
This page lists the node's network interfaces with their state and addresses, and the system services with whether each is active (Fig. 14).
Radios
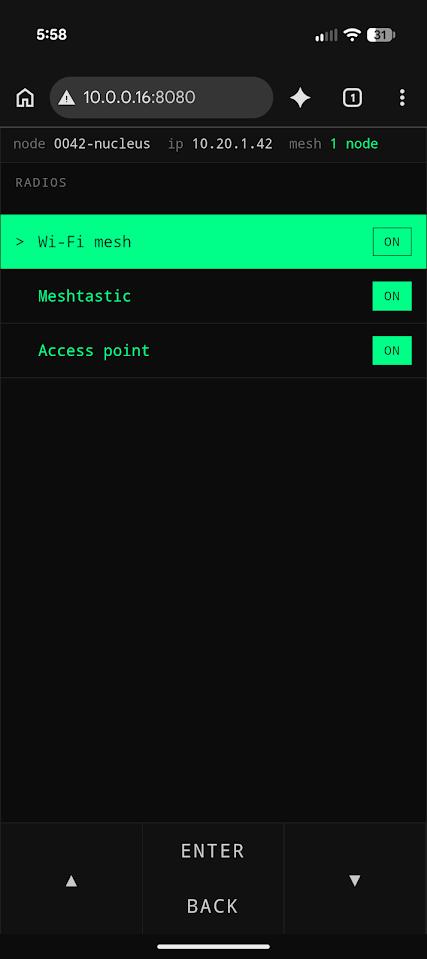
This page turns the Wi-Fi mesh, the Meshtastic radio and the access point on or off (Fig. 15).
Reticulum
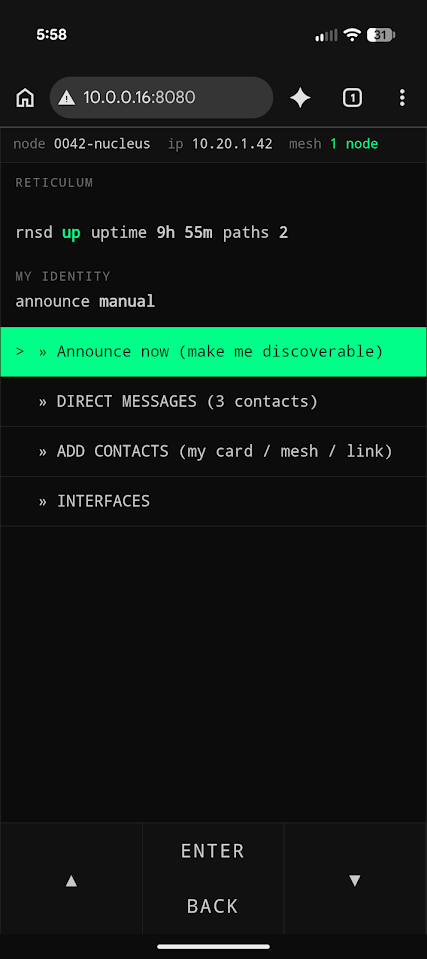
This page shows whether the Reticulum daemon (rnsd) is up, its uptime, the number of known paths and the node's announce setting (Fig. 16). Announce now makes the node discoverable to others. Direct Messages, Add Contacts and Interfaces open the pages below.
Reticulum Direct Messages
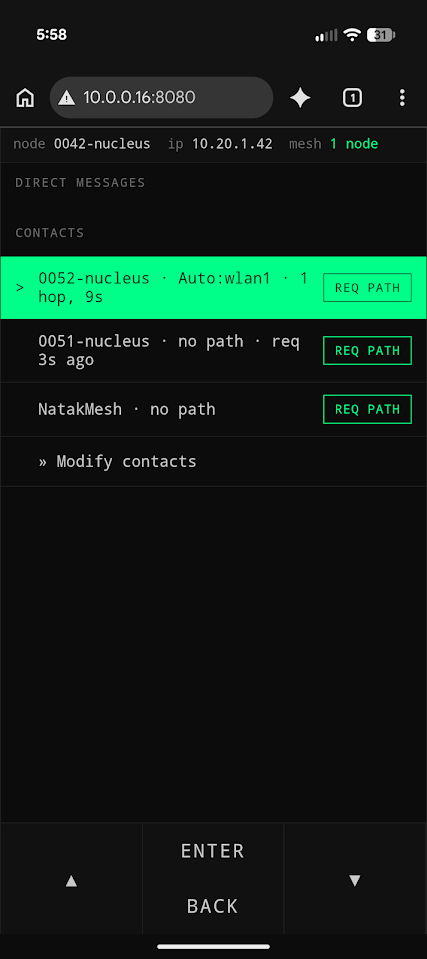
This page lists your contacts and whether a path to each one is known (Fig. 17). REQ PATH requests a path to a contact. Modify contacts edits the list.
Reticulum Add Contacts
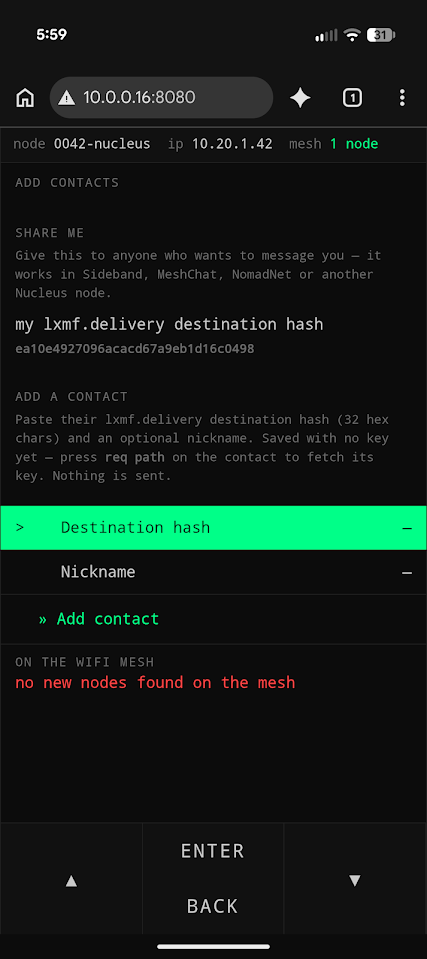
This page shows the node's own address (its lxmf.delivery destination hash) to give to anyone who wants to message you. It works in Sideband, MeshChat, NomadNet or another Nucleus (Fig. 18). To add a contact, paste their 32-character destination hash, enter an optional nickname and select Add contact. Then press REQ PATH on the contact to fetch its key. Nodes found on the WiFi mesh are listed at the bottom.
Reticulum Interfaces
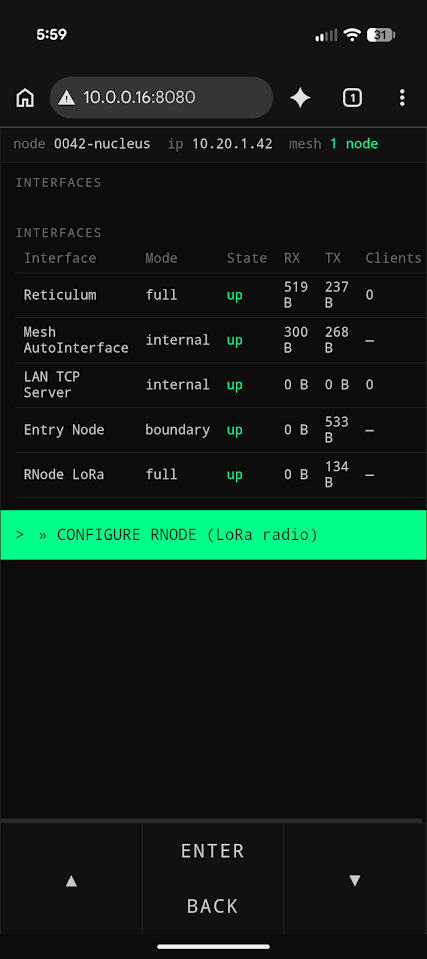
This page lists the Reticulum interfaces with their mode, state, traffic and clients (Fig. 19). Configure RNode sets up the RNode LoRa radio.
Tailscale
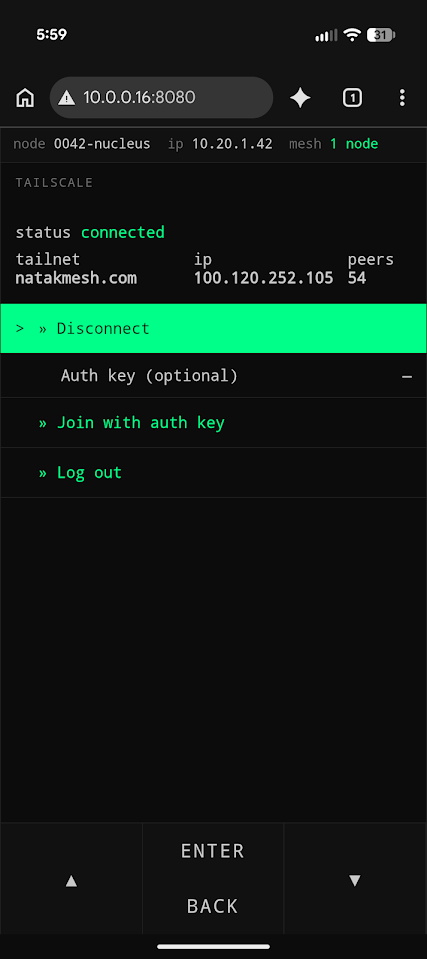
This page allows the user to start/stop Tailscale connections and select a tailnet if there are multiples configured (Fig. 20). As a default, the node will be connected to the Natak Mesh tailnet to allow remote updating and troubleshooting if desired. New tailnets can be added or removed as desired.
Radio Configuration
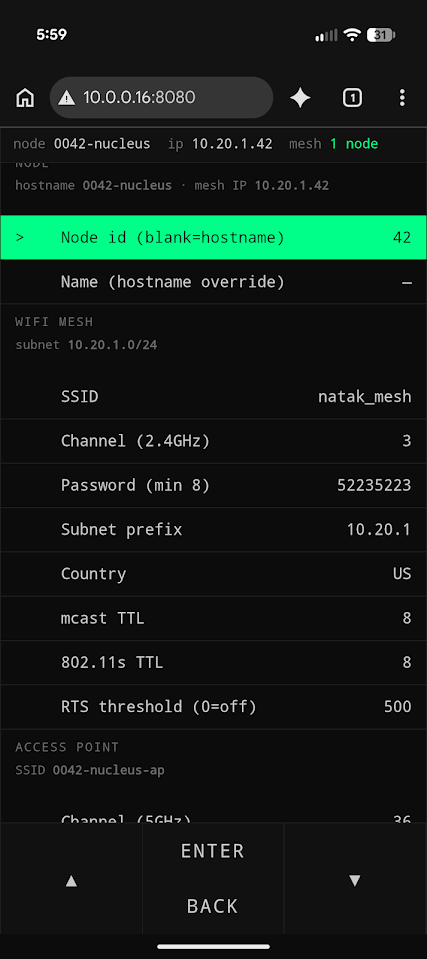
The Radio Configuration page allows modification of mesh and node variables without having to edit system files directly (Fig. 21).
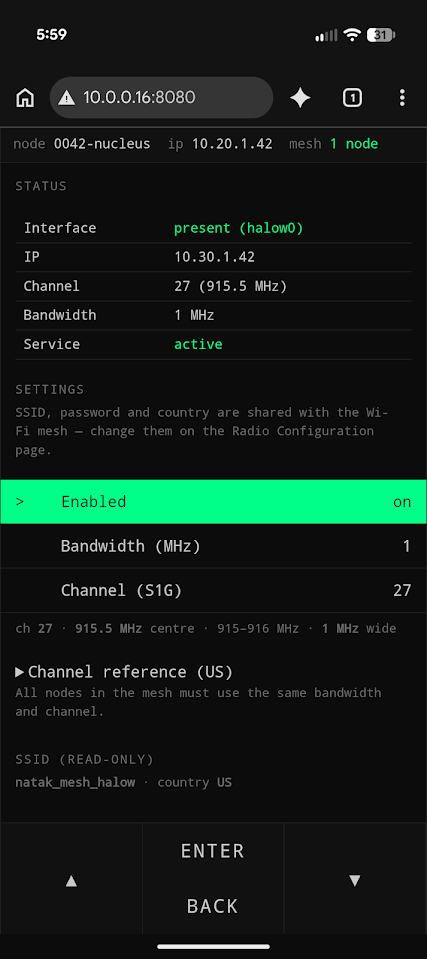
HaLow
This page shows the HaLow radio's interface, IP address, channel, bandwidth and service state (Fig. 22). HaLow is turned on or off here, and its bandwidth and channel are set here. All nodes in the mesh must use the same bandwidth and channel. The SSID, password and country are shared with the Wi-Fi mesh and are changed on the Radio Configuration page.
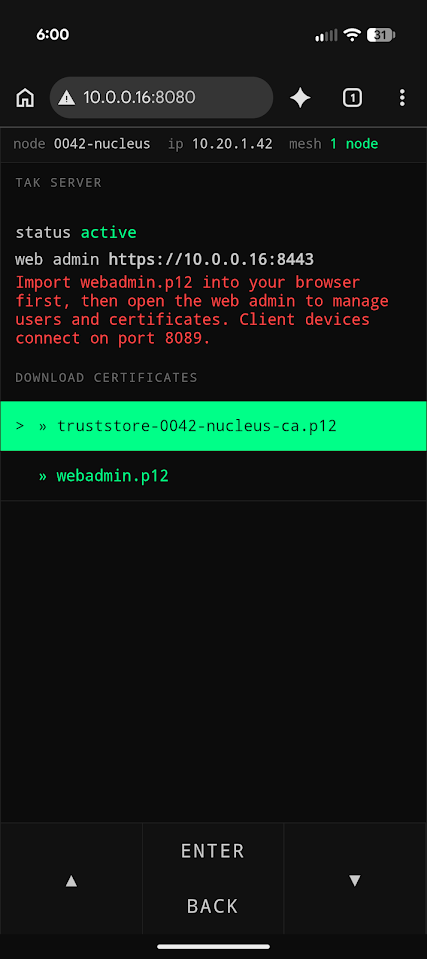
TAK Server Page
This page is for the official TAK Server running on the Nucleus. It displays the server running state and the address of the TAK Server web admin, and provides the certificates needed to use it (Fig. 23).
Download webadmin.p12 and import it into your browser before opening the web admin. The web admin is where users and certificates are managed. The truststore (truststore-00xx-nucleus-ca.p12, where xx is your node's serial number) can also be downloaded here. Client devices connect to the TAK Server on port 8089.
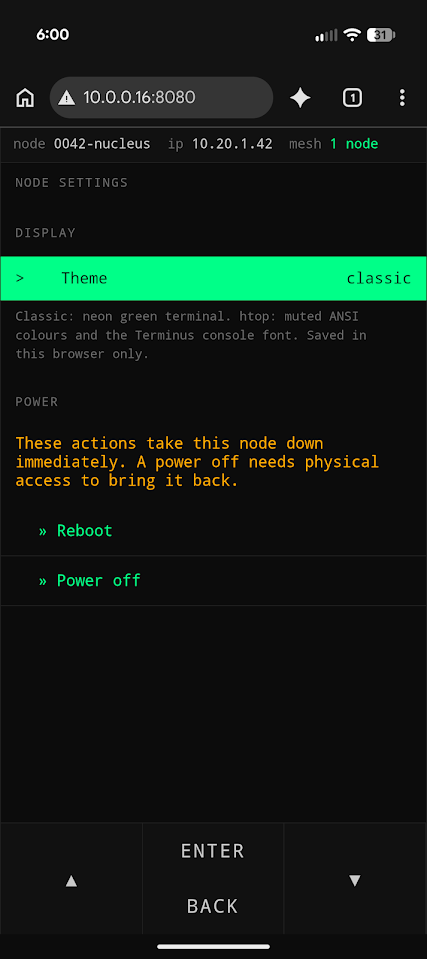
Node Settings
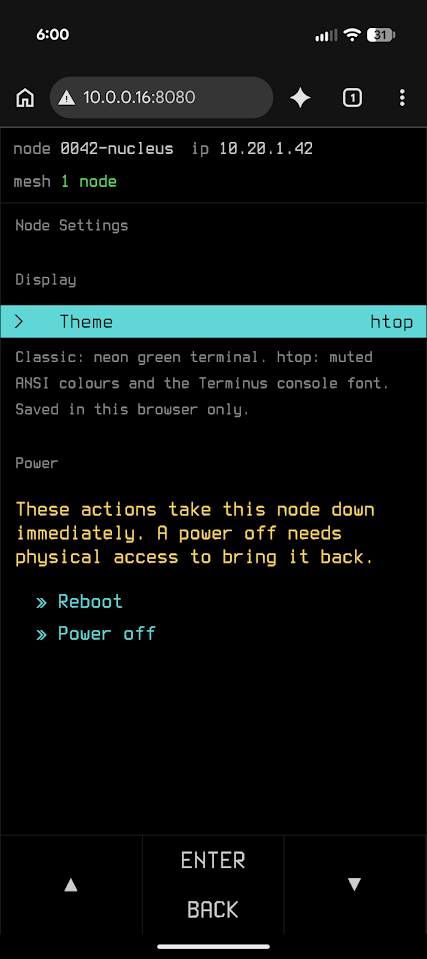
Theme switches the web UI between the classic and htop styles (Fig. 24, Fig. 25). The theme is saved in that browser only. Reboot and Power off take the node down immediately. After a power off, the node can only be turned back on with physical access.
04Node Administration
Node Administration
SSH Access
SSH is enabled on the Nucleus. To access the node directly, plug it into your router or switch via the ethernet port — it will accept an IP address from your DHCP server. Avahi is running on the node, so it should be discoverable on your local network at:
ssh natak@00xx-nucleus.localWhere xx is the node's serial number printed on the case. The default password is 52235223.
Nucleus OS Repository
A local copy of the git repository used to deploy the Nucleus software is located at ~/Nucleus_os. The Nucleus live file system is configured per that repo. To pull the latest updates, run git pull from within the repo directory. Changes will then be available to deploy.
05App Setup
App Setup
Sideband
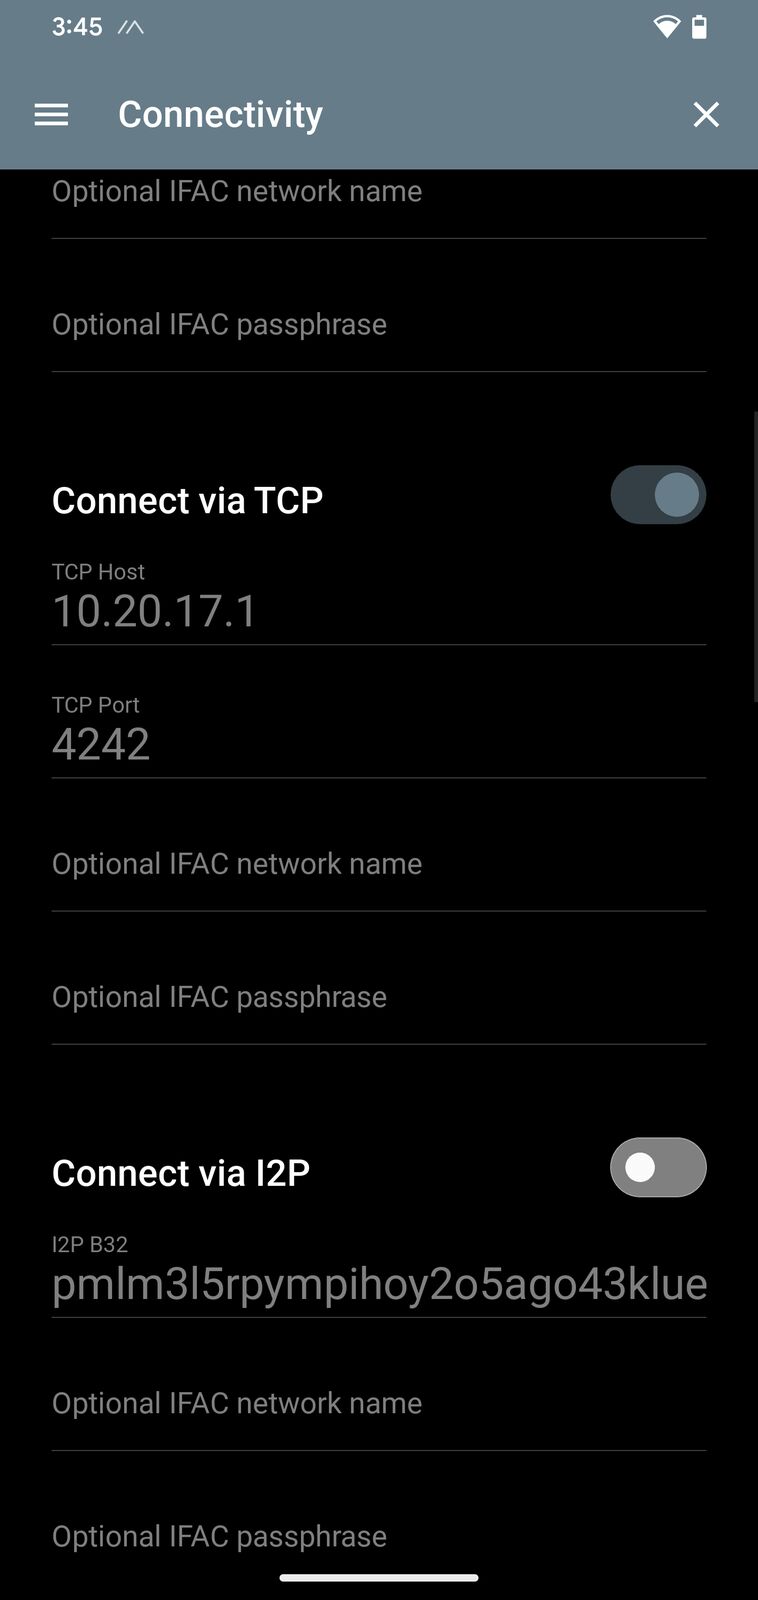
Navigate to the Connectivity section of Sideband and configure the TCP settings to match those shown in Fig. 26. All IP addresses should be replaced with your node's IP address — the 10.20.17.1 shown is only an example.
ATAK
ATAK will automatically take advantage of the Nucleus Wi-Fi mesh with no configuration needed. The CoT bridge also automatically forwards PLI and ATAK messages over the Meshtastic radio, with no configuration needed in ATAK.